


iPhone 16 Pro Max vs iPhone 15
October 5, 2025
Nearly half of smartphone owners face a cracked display at some point, turning every swipe into a gamble with shattered glass. This DIY phone screen replacement guide empowers you to restore a pristine touchscreen, boost repair precision, and save up to 70% compared to professional services. You’ll explore six core themes:
These thematic pillars establish the foundation for each H2 section, beginning with the critical toolkit you’ll assemble for a successful screen replacement.
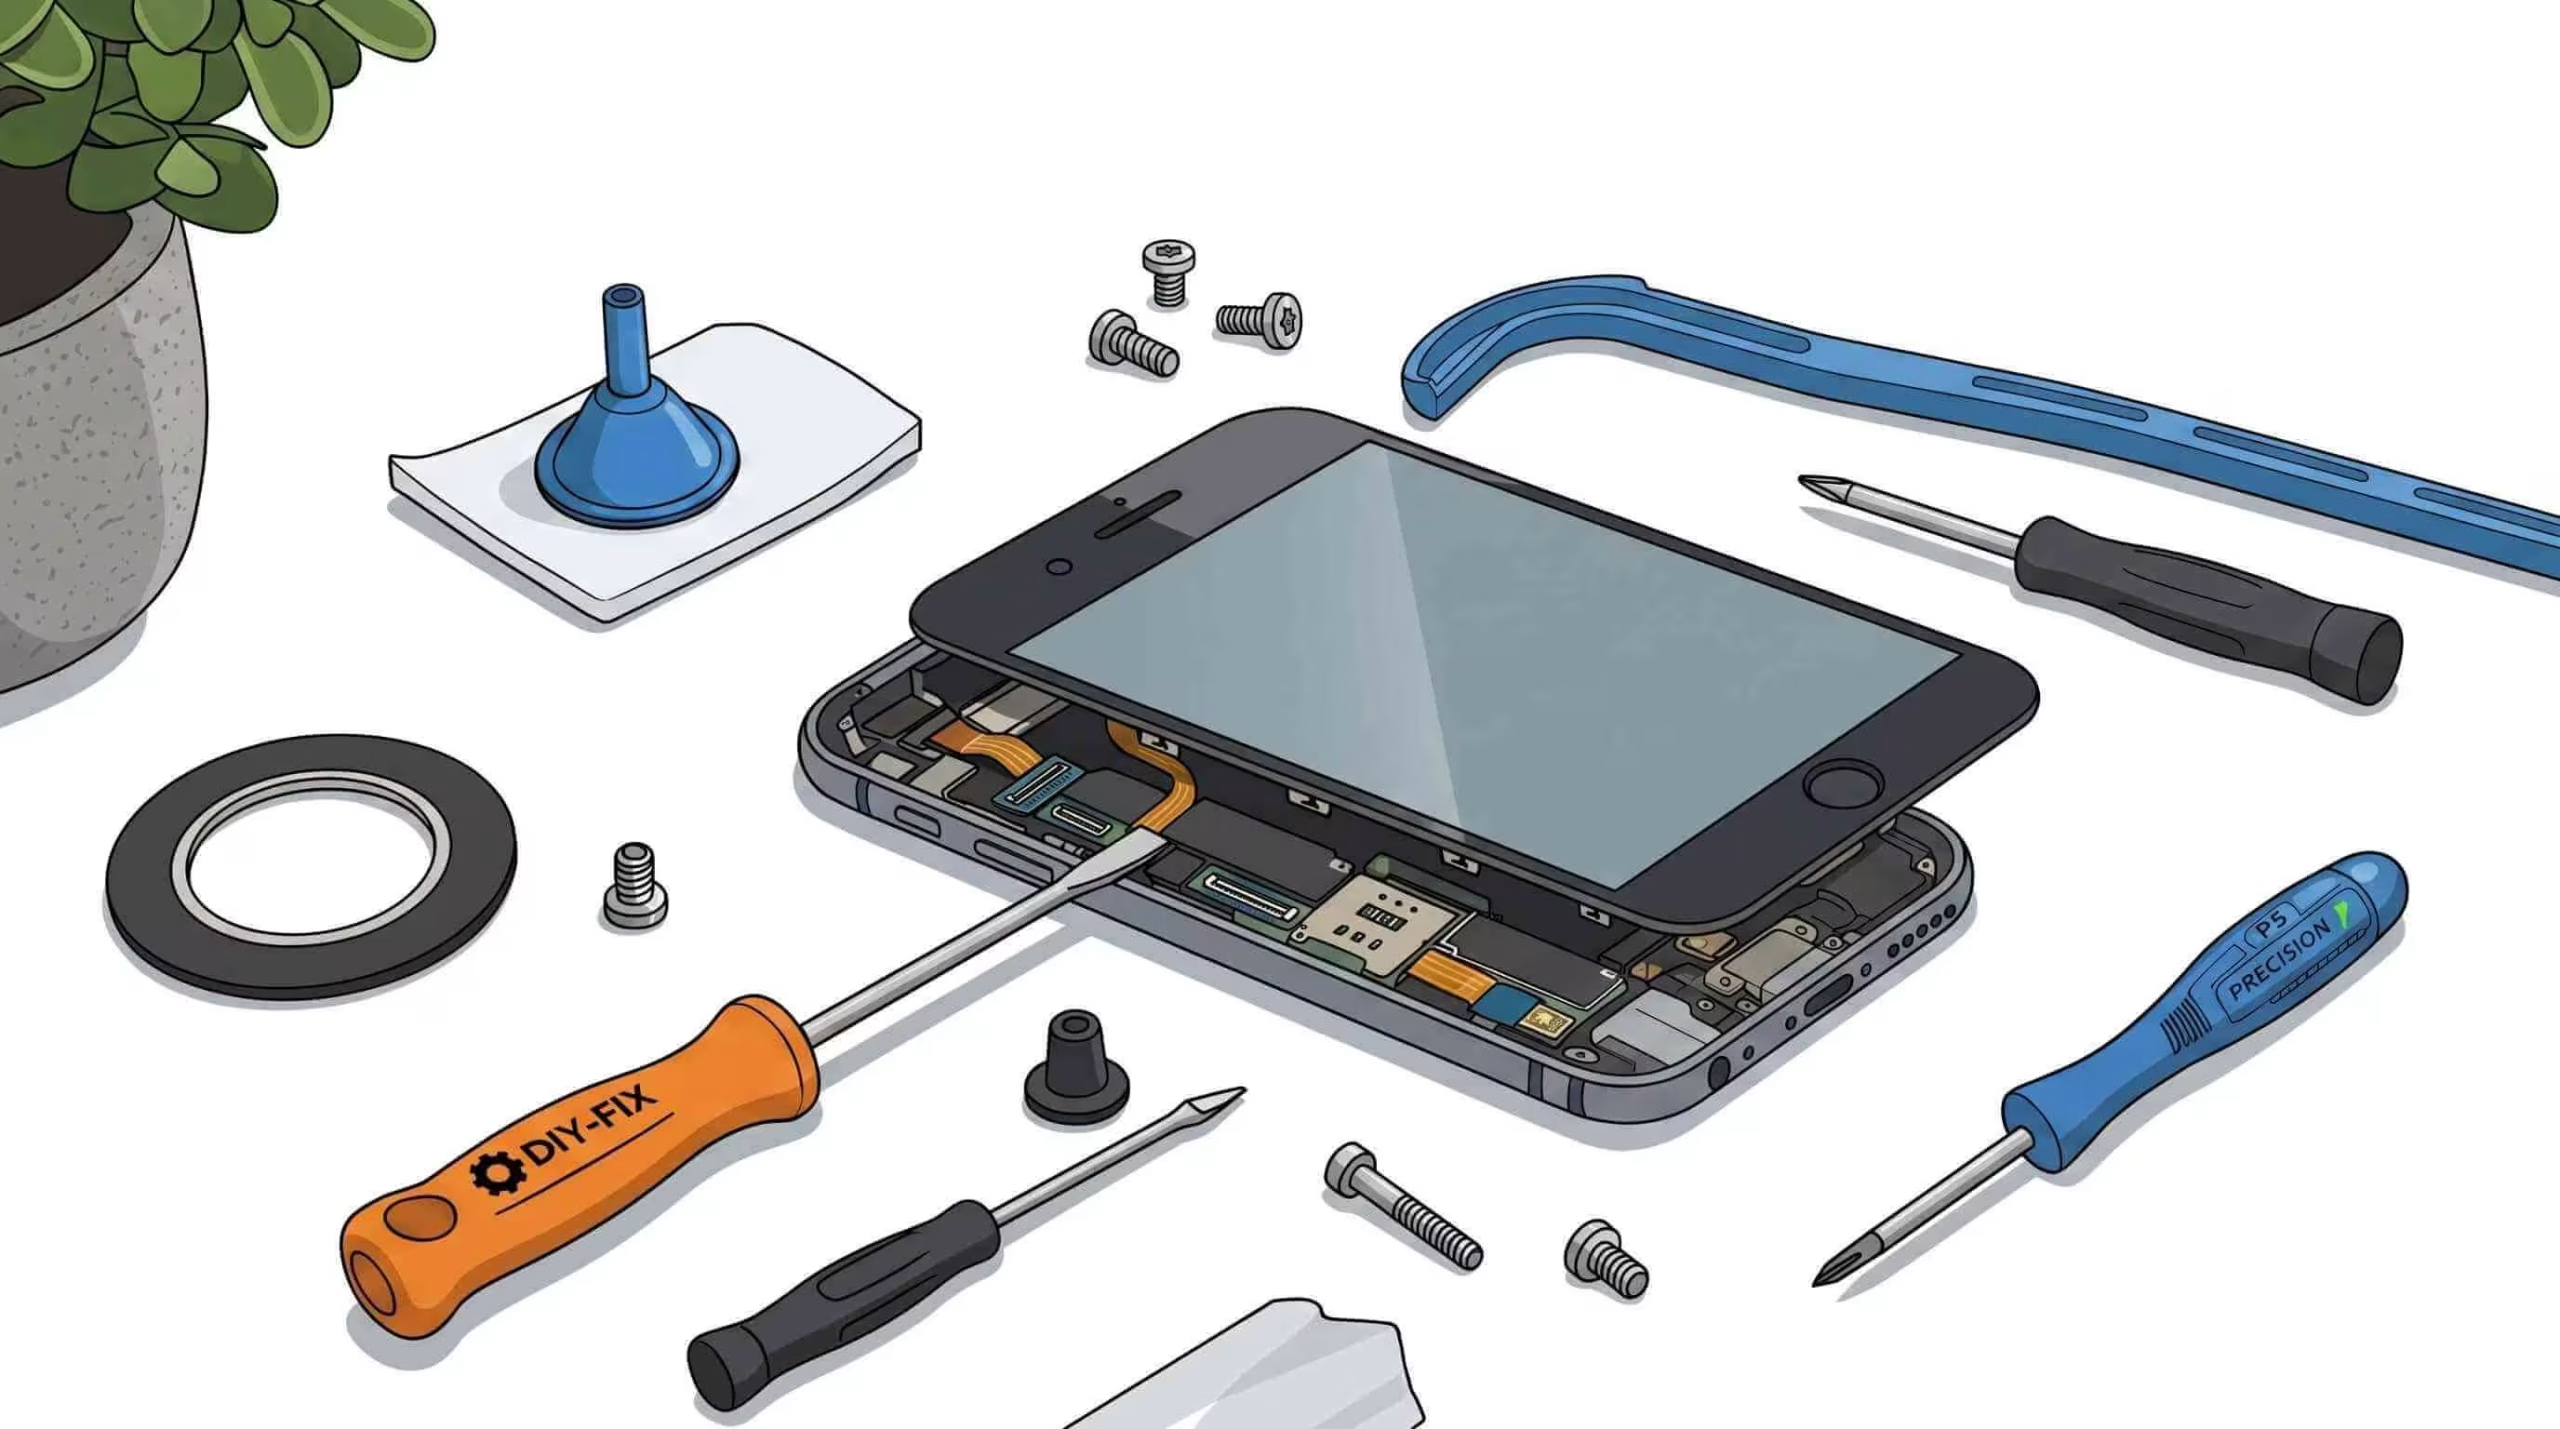
Essential tools for phone screen replacement form the backbone of safe disassembly and precise reassembly, improving component integrity and reducing risk of damage. A curated toolkit empowers you to remove screws, soften adhesive, and protect sensitive electronics with confidence.
Using the right tools ensures stable device handling and prepares you for accurate screen type identification.
Specialized tools, including precision screwdrivers, pry tools, and heat sources, are crucial for phone screen replacement. These tools help safely disassemble and reassemble the device, minimizing the risk of damage to sensitive components like the LCD or OLED panels when you are doing DIY Phone Screen Replacement.
This source provides detailed guides and tool recommendations that align with the article’s emphasis on using the right tools for phone screen repair. Read step by step DIY Smartphone repair guide from Cellshoppe expert technician
Pentalobe, Phillips, and Torx screwdrivers coupled with plastic pry tools deliver secure torque control and non-conductive leverage, preventing stripped screws and electrical shorts.
Tool Type | Characteristic | Repair Advantage |
Pentalobe Screwdriver | Five-point security head | Removes iPhone frame screws without stripping |
Phillips & Torx Set | Cross and star bit variations | Accesses internal shields and mid-frame brackets |
Plastic Spudger | Non-conductive, thin tip | Separates screen glass from frame safely |
Suction Cup | Rubber vacuum seal | Lifts glass evenly without cracking |
Choosing the right screwdriver head and non-metallic pry tools minimizes hardware damage while setting up precise heat-aided adhesion removal.
Controlled heat application softens frame adhesive, easing screen separation without cracking the display glass.
High-bond waterproof frame adhesive and manufacturer-matched screen assemblies secure pixel accuracy and restore water resistance.
Reliable adhesives ensure a dust- and water-tight seal, supporting device longevity and touch responsiveness.
An anti-static mat dissipates electrostatic discharge (ESD) that can damage microcircuits, while safety glasses shield your eyes from flying glass shards.
Safety Supply | Function | Repair Benefit |
Anti-Static Mat | Grounds static charge | Prevents ESD damage to circuit boards |
Eye Protection | Impact-resistant lenses | Shields eyes from fragment hazards |
ESD-Safe Tweezers | Coated metal tips | Handles ribbon cables without shorts |
These safety measures protect both you and your device, enabling a controlled workspace that leads to accurate screen type identification.
Screen type identification recognizes your display’s technology LCD, OLED, or AMOLED by examining model specifications and display behavior. This ensures part compatibility and optimal image performance. Also take backup of your phone for security and data safety.
Understanding the differences between LCD, OLED, and AMOLED screens is essential for successful repairs. Each technology has a unique structure and requires different handling techniques, influencing the repair process and the choice of replacement parts.
This source clarifies the distinctions between different screen technologies, which supports the article’s section on identifying screen types before replacement.
Display Technology | Layer Structure | DIY Consideration |
Liquid Crystal Display (LCD) | Backlight + Liquid Crystal layer | Requires careful backlight detachment |
Organic Light-Emitting Diode (OLED) | Self-emissive pixel array | Flexible panel demands gentle flexing |
Active Matrix AMOLED (AMOLED | Thin film transistor + OLED | Sensitive to pressure, avoid bending stresses |
LCD panels rely on a separate backlight to illuminate liquid crystals, while both OLED and AMOLED use self-emissive diodes that improve contrast and reduce thickness. These distinctions affect repair complexity, panel flexibility, and part cost.
LCD: Rigid glass, separate backlight, easier to align, but with a thicker profile.
OLED: Thin, flexible, with no backlight, and has a higher risk of damage from force.
AMOLED: Similar to OLED with an integrated thin-film transistor, offers faster refresh but demands delicate cable handling.
Understanding these core technologies reduces the risk of mismatched parts and informs precise adhesive and heat settings.
Identifying your exact phone model ensures the purchase of a matching screen assembly with the correct digitizer and connector layout. If you have a refurbished or pre-owned device.
Accurate model matching prevents hardware incompatibility, enabling you to choose between glass-only or complete assembly replacement of DIY Phone Screen Replacement.
You can replace just the glass DIY Phone Screen Replacement to preserve the original digitizer or install a complete screen assembly for more straightforward reassembly and lower risk of display failure.
Glass-Only Replacement: Saves cost and retains the factory touch sensor but demands OCA lamination equipment.
Full Assembly Swap: Includes digitizer and frame adhesive, reduces risk of sensor damage, and simplifies installation.
Selecting the correct repair scope maximizes restoration quality and aligns with your tool availability.
Quick Questions!
For a successful phone screen replacement, you’ll need precision screwdrivers (Pentalobe, Phillips, or Torx), plastic pry tools, a heat source (like a heat gun or hair dryer), adhesives, an anti-static mat, and safety gear like eye protection. These tools help safely disassemble and reassemble your phone, minimizing the risk of damaging delicate components.
To safely remove a phone screen, use a heat gun set to 80–100 °C (176–212 °F) or a hair dryer on high. Apply heat to the edges of the frame for 1–2 minutes, moving the heat source continuously to avoid hotspots. This softens the adhesive, making it easier to separate the screen without damaging it.
For a secure and long-lasting replacement, use optically clear adhesive (OCA) strips that match your display type (LCD, OLED, or AMOLED). Waterproof frame adhesive rated IP67 or higher ensures a dust- and water-tight seal. It’s important to use manufacturer-matched adhesives to maintain touch sensitivity and water resistance.
You can identify your screen type (LCD, OLED, or AMOLED) by checking the phone’s specifications or model number. LCD screens are rigid and have a backlight, while OLED and AMOLED screens are flexible and self-emissive. Knowing your screen type helps ensure compatibility with the replacement parts.
LCD screens use a backlight and are thicker and more rigid. OLED screens are thinner, flexible, and don’t require a backlight, but they are more sensitive to pressure. AMOLED screens are similar to OLED but have an integrated thin-film transistor for faster refresh rates. These differences impact repair complexity and part selection.
To find the right replacement screen, check your phone’s model number under Settings → About Phone or printed on the device frame. Cross-reference the model number with manufacturer repair catalogs, ensuring the screen assembly matches your phone’s digitizer, connector layout, and waterproof seal specifications.
You can replace just the glass if you want to save money and retain the original digitizer, but this requires specialized equipment. Alternatively, replacing the entire screen assembly (which includes the digitizer and frame adhesive) simplifies installation and reduces the risk of display failure.
Using an anti-static mat and wearing eye protection are essential safety measures. The anti-static mat prevents electrostatic discharge (ESD) that can damage internal circuits, while eye protection shields you from potential glass shards during the disassembly process.
October 5, 2025
October 5, 2025
September 19, 2025
September 19, 2025
September 18, 2025
September 18, 2025
Address: 15803 87 Ave NW, Edmonton, AB T5R 4G7, Canada
Phone: +1 587-444-5888
Support


To Grab The Offer, Fill The Form and Submit Now!


